Appearance
Troubleshooting Remote Control for Cisco IP Phones in Callmanager
CiscoIPPhoneError Number="4" is simply the phone reporting back a failure to authenticate. Error 4 can occur due to many reasons, including incorrect application user configuration, misconfiguration of device association, ITL Trust, or authentication server URL, even DNS resolution issues.
We will cover each of them below, and provide steps to troubleshoot and resolve the issue.
Testing from Call Telemetry
Let's start by testing the remote control from the Call Telemetry. Internally, for most phones, Call Telemetry is requesting the url http://<phone-ip>/CGI/Screenshot to get the phone's screenshot. Some models require a different URL, but the process is similar.
There are 2 ways to test from within Call Telemetry.
- You can test it from within the Cisco Callmanager settings page, type the IP of the Cisco IP Phone and click the Test button. It will return an error, or the phone's screenshot.
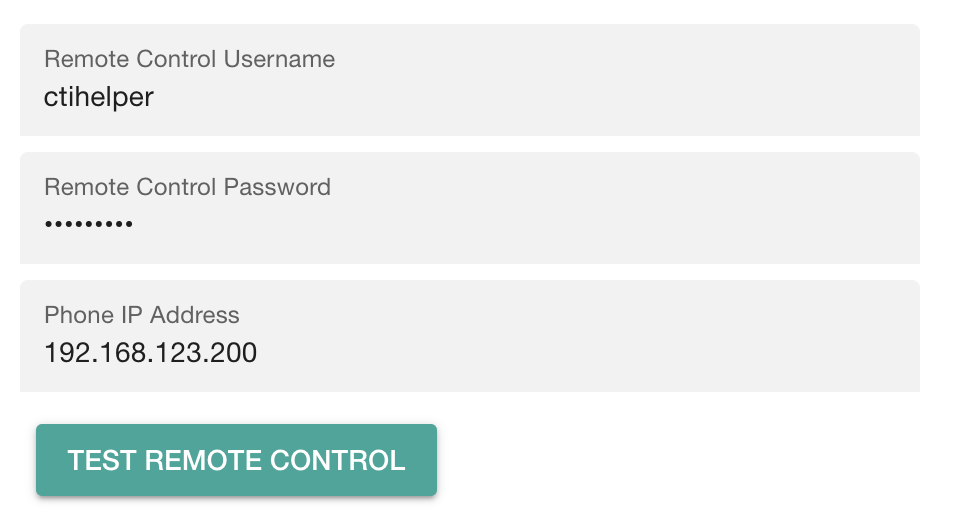
- The other way to test is to discover the phone from the Call Telemetry and attempt to control it from Phone Dashboard.
Assuming you see Error Number 4 on either page, let's move on to troubleshooting.
Verify Cisco CTI User Configuration
Ensure that the application or end user created in Cisco Callmanager has the necessary roles and permissions for remote control.
Verify the Password for the Application User
Yes, it's sometimes that simple as a wrong password.
- Confirm that the password for the application user is correct.
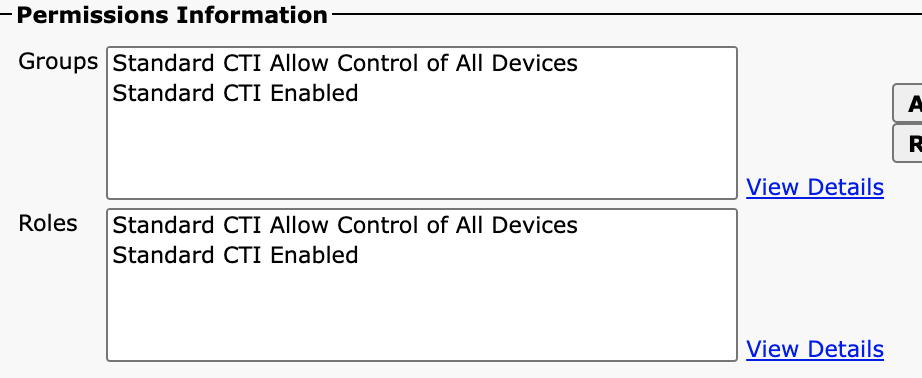
Verify Roles Assigned to End User
Verify the user is assigned to these groups.
- Standard CTI Allow Control of All Phones
- Standard CTI Enabled
Below is a screenshot of correct roles configration.
Verify Device Association
Confirm that the device intended for remote control is correctly associated with the application user. Even though you have assignd CTI Allow Control of All phones, this does not mean the user can control all phones. The user must be associated with the device to control it.
- Confirm that the target Cisco IP Phone is associated with the end user or application user.
Below is a screenshot showing an example of device associations.

Cisco IP Phone ITL Trust Issues
Initial Trust List (ITL) trust issues can prevent the Cisco IP Phone from authenticating with Cisco Callmanager. ITL trust issues can arise due to outdated or mismatched trust lists, preventing the phone from properly authenticating with Cisco Callmanager.
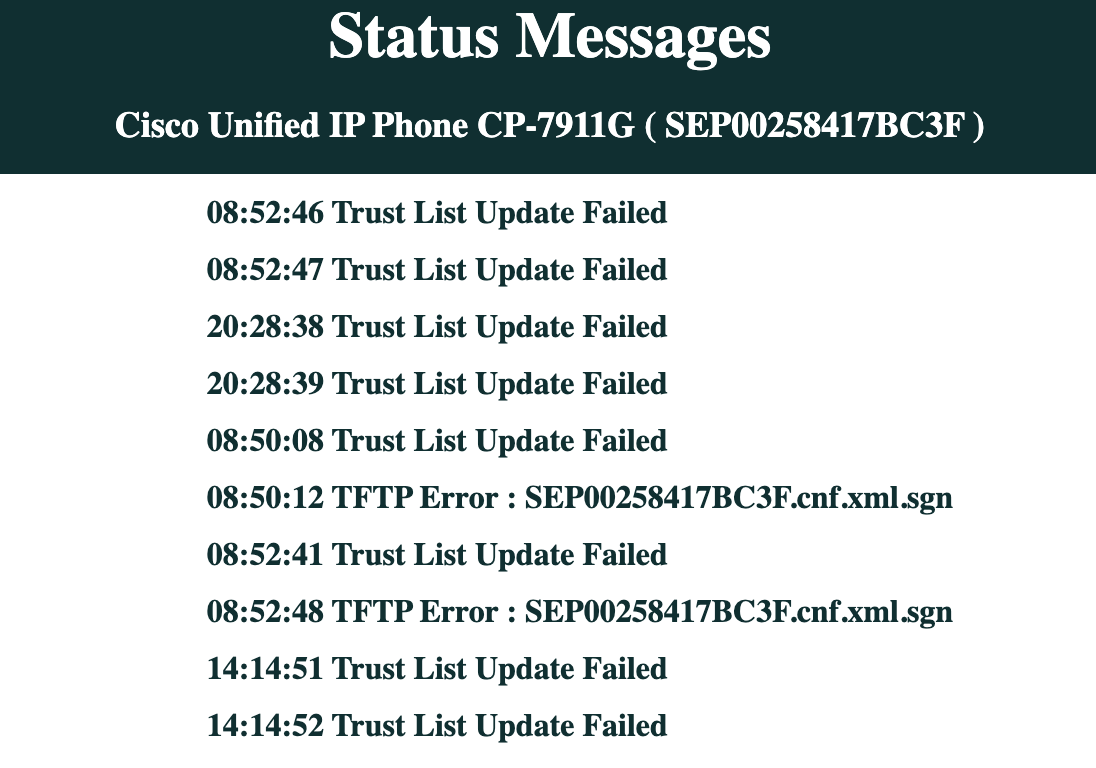
The easiest way to verify this is to check the phone's status page for any ITL trust error messages - like ITL Trust Failed.
Steps to check:
- Open a web browser to the IP address of your target Cisco IP Phone being tested.
- Navigate to the phone's status page.
- Look for messaages such as ITL Trust Failed or similar messages indicating trust issues.
The following IP Phone has an ITL trust issue, and needs a security settings reset or a factory reset.
Below is an aexmaple of an ITL Trust Failed message on a Cisco IP Phone. This phone is not receiving it's full configuration from Cisco Callmanager TVS Service, and cannot authenticate CTI authentication requests with Cisco Callmanager due to an ITL trust issue.
The easiest way to fix this is to reset the phone's security settings or perform a factory reset on the target phone. If this is a wider spread issue, this may require a security settings reset on all affected phones and is beyond the scope of this guide.
Reset ITL Security on the Cisco IP Phone:
- Access the phone's settings menu by pressing the Settings button.
- Navigate to Security Configuration or Security Settings.
- Select Trust List or ITL File.
- Choose the option to Reset Security Configuration or Reset ITL.
- Confirm the reset action and restart the phone.
Authentication Server DNS Resolution
Ensure that the authentication URLs in your Cisco Callmanager Service Parameters use Fully Qualified Domain Names (FQDN) or IP addreses. DNS resolution issues will prevent the IP phone from authenticating with the server, which ultimate result in the infamous Error 4.
Verify Authentication URLs in Cisco Callmanager
- Access Cisco Unified Communications Manager (CUCM) administration.
- Navigate to System > Enterprise Parameters.
- Check the URL Authentication parameters for both HTTP and HTTPS.
- Verify that the URLs are correct and can be resolved by DNS.
If the URL is incorrect or cannot be resolved by DNS, update the URL to a valid FQDN or IP address, and reset your IP phones to apply the changes.
Below is a screenshot of example lab URL Authentication parameters in Cisco Callmanager. 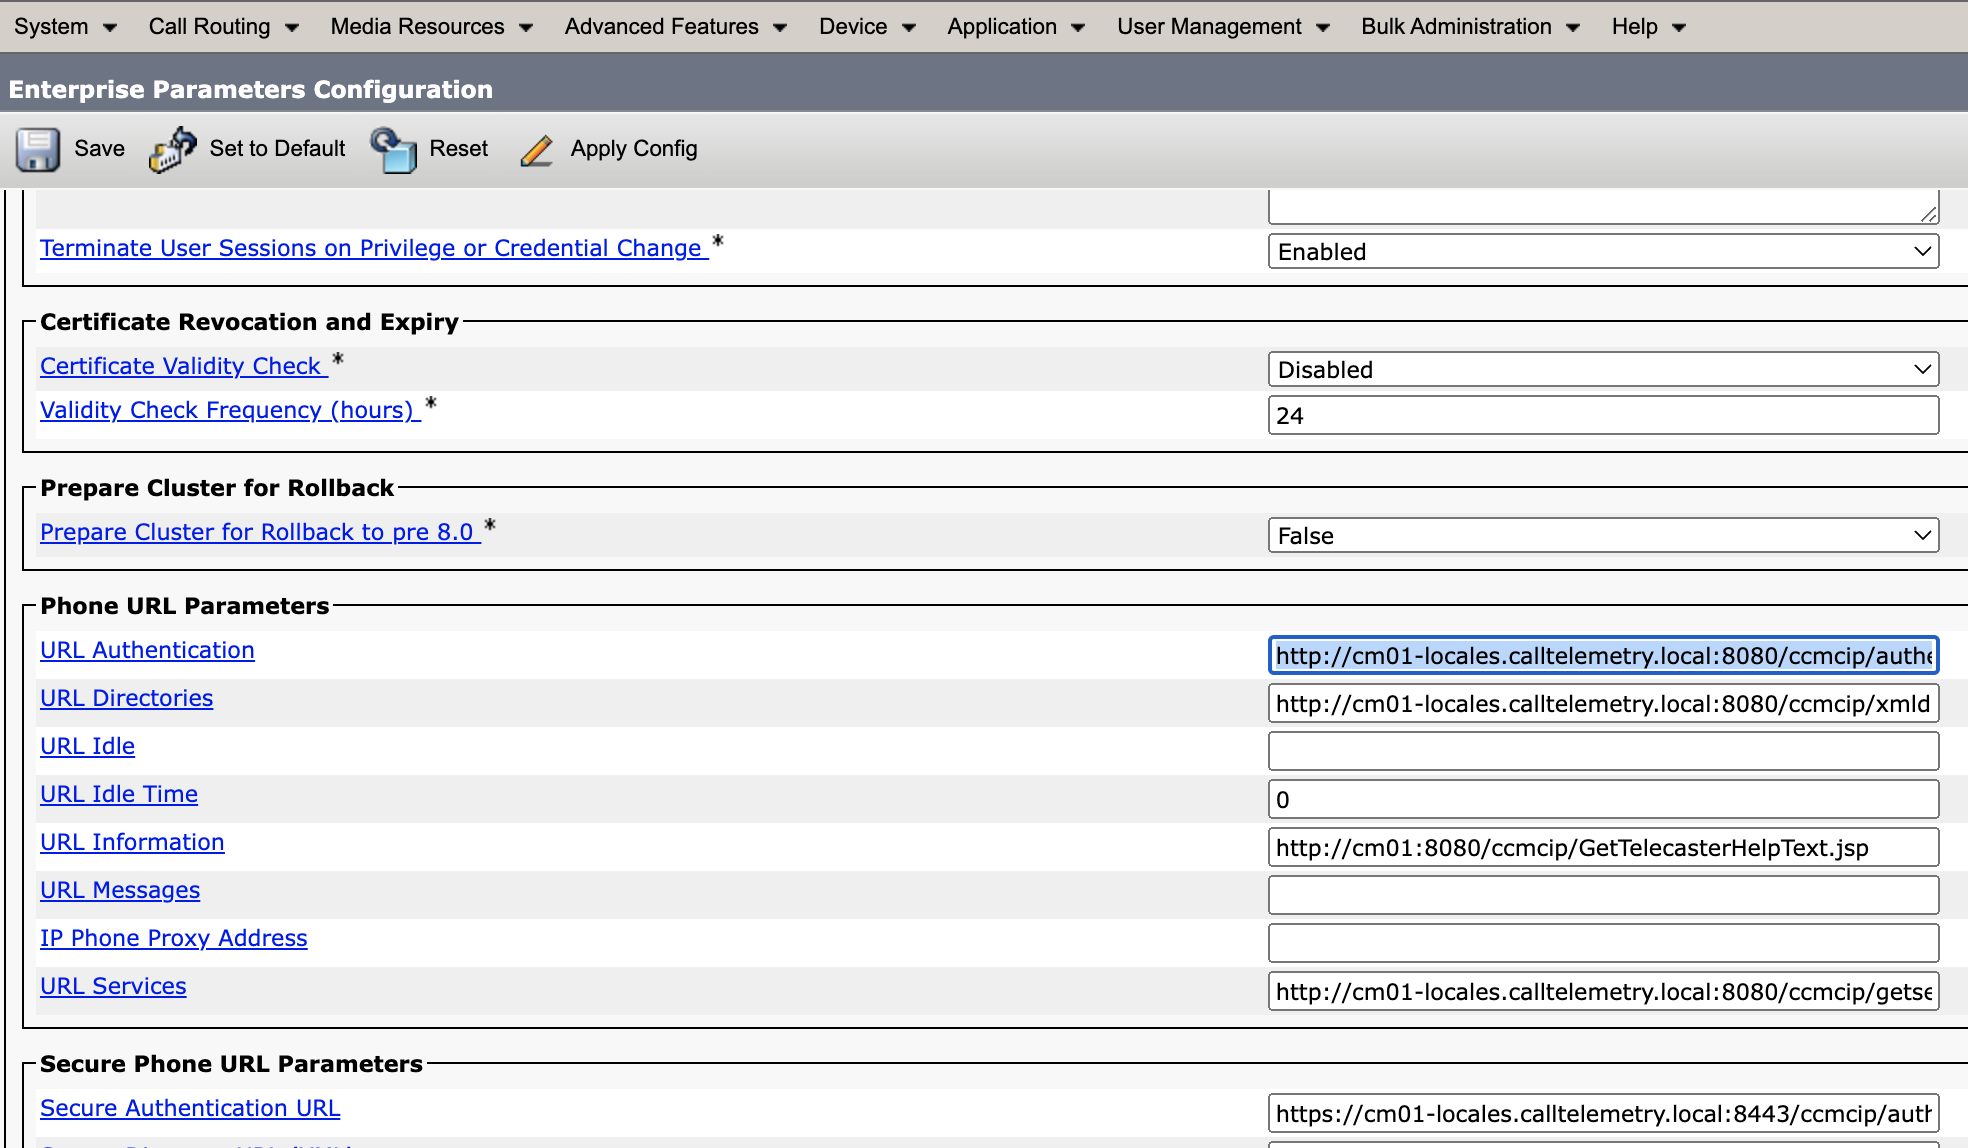
Advanced Troubleshooting Steps
If you're still seeing Error 4 from your Cisco IP Phone, it's time to dig even deeper. We're going to talk directly to the Cisco Callmanager Authentication APIs, and the Cisco Phone XML API and see what's going on.
Using Postman for Troubleshooting
I like to use Postman for direct interaction with phones to validate configurations. Postman is a free tool that allows you to send HTTP requests to your Cisco Callmanager and Cisco IP Phones.
Cisco Callmanager Authentication API
The URLs that we verified in the steps above are the URLs that the Cisco IP Phone uses to authenticate with Cisco Callmanager. We can use Postman to test these URLs directly. Build a payload with the following parameters:
- username: The username of the application user.
- password: The password of the application user.
- devicename: The SEP Device Name of the target Cisco IP Phone.
The URL is in the format of http://<cucm-ip>/ccmcip/authenticate.
Below is an example of the payload, showing a correct authenticaiton request and response. 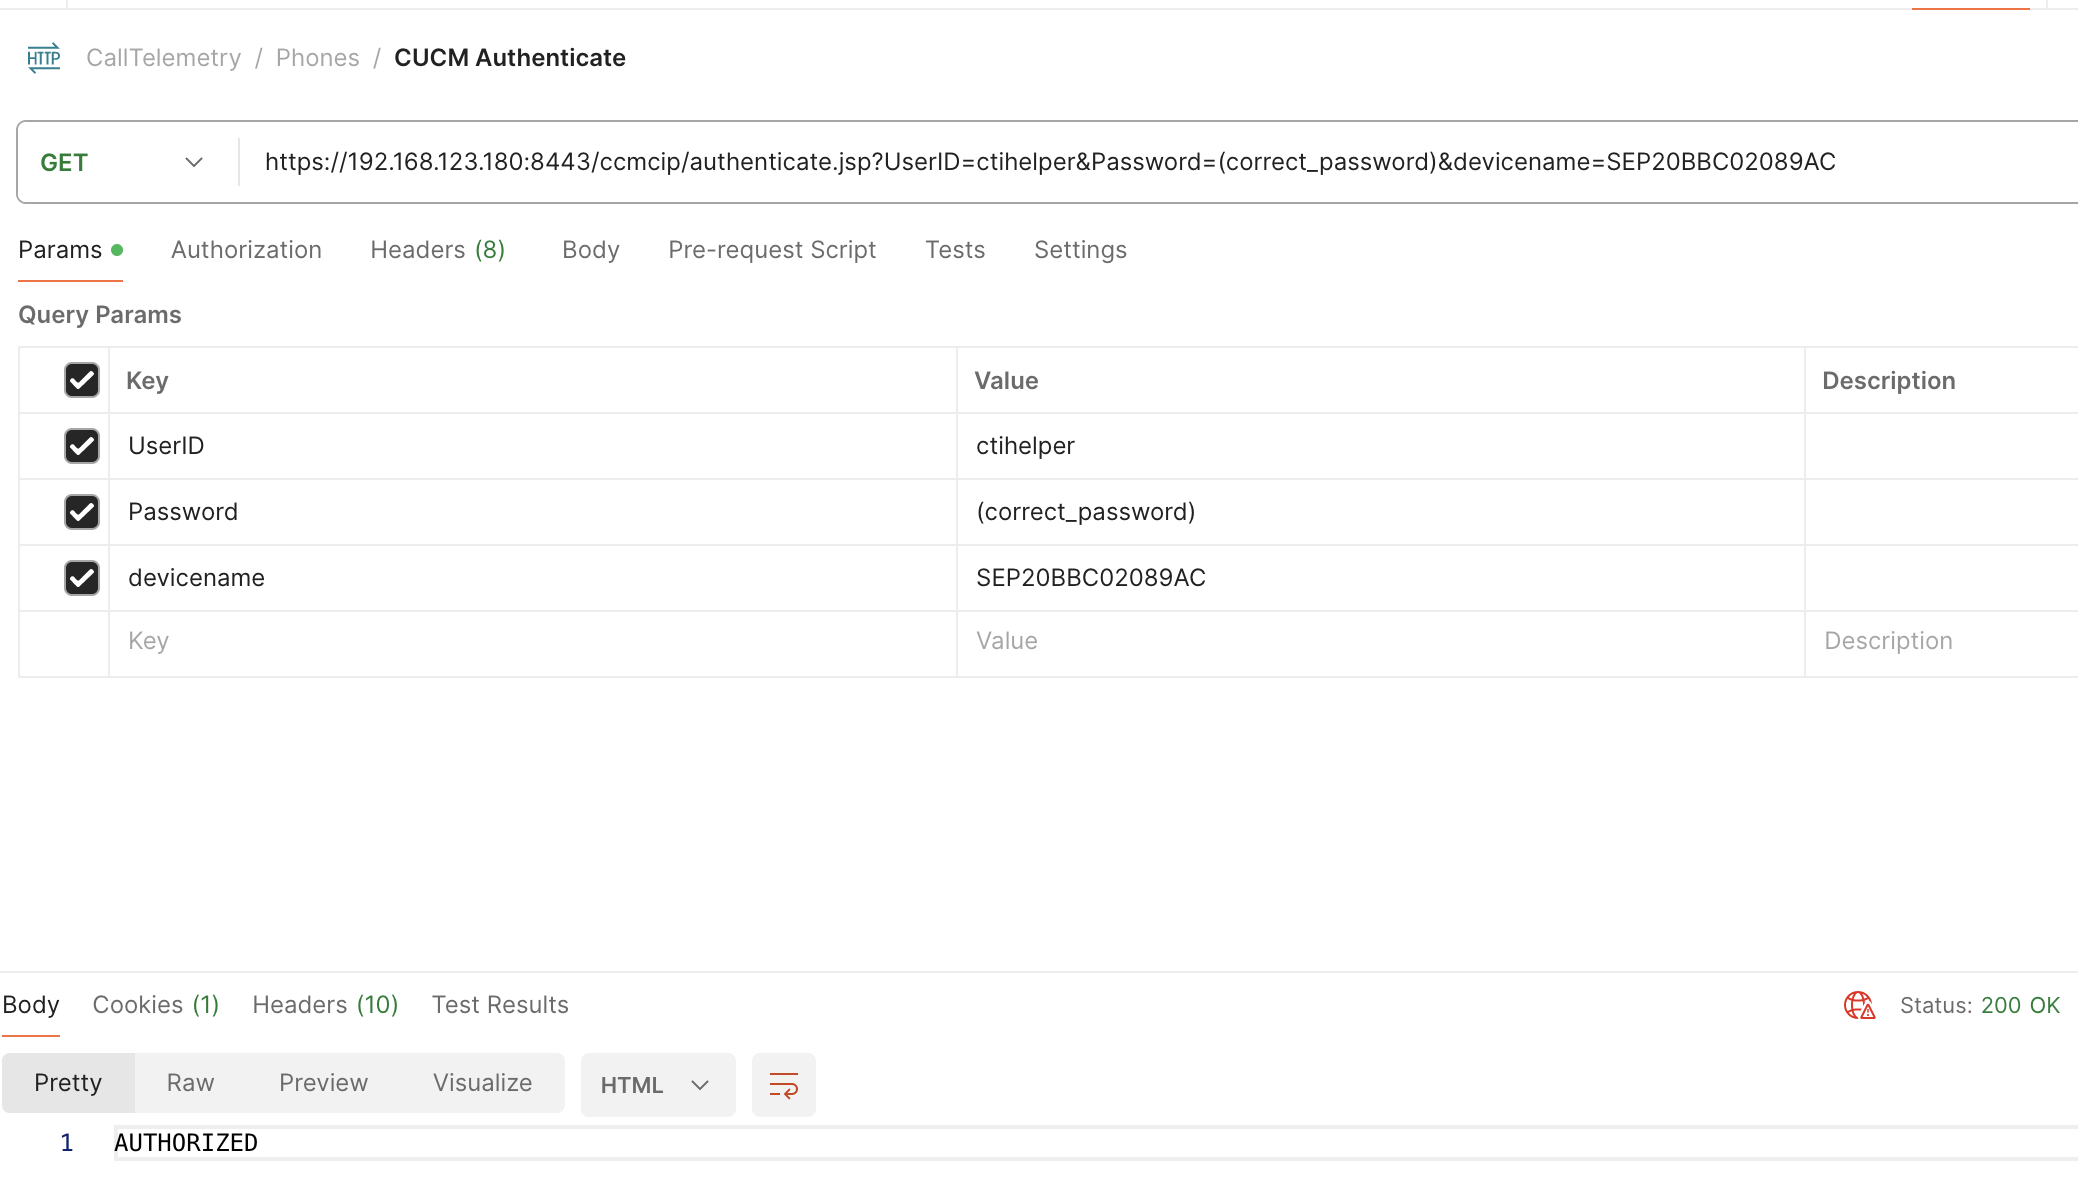
If you receive UNAUTHORIZED, this means that Cisco Callmanager has rejeced your authentication request to control the phone. This could be due to incorrect credentials, or the phone is not associated with the application user.
Requesting Cisco IP Phone Screenshot
With all the above, we've verified that the Cisco Callmanager is correctly configured, ITL, Users are verified, and the screenshot request should work. Next we need to verify that the Cisco IP Phone can authenticate with Cisco Callmanager, and return a screenshot.
We can use the Cisco Phone XML API to request a screenshot from the target Cisco IP Phone. The URL is in the format of http://<phone-ip>/CGI/Screenshot.
Below is an example of a successful request for a screenshot from a Cisco IP Phone. If it's successful, you will see the entire phone's screen in the response. 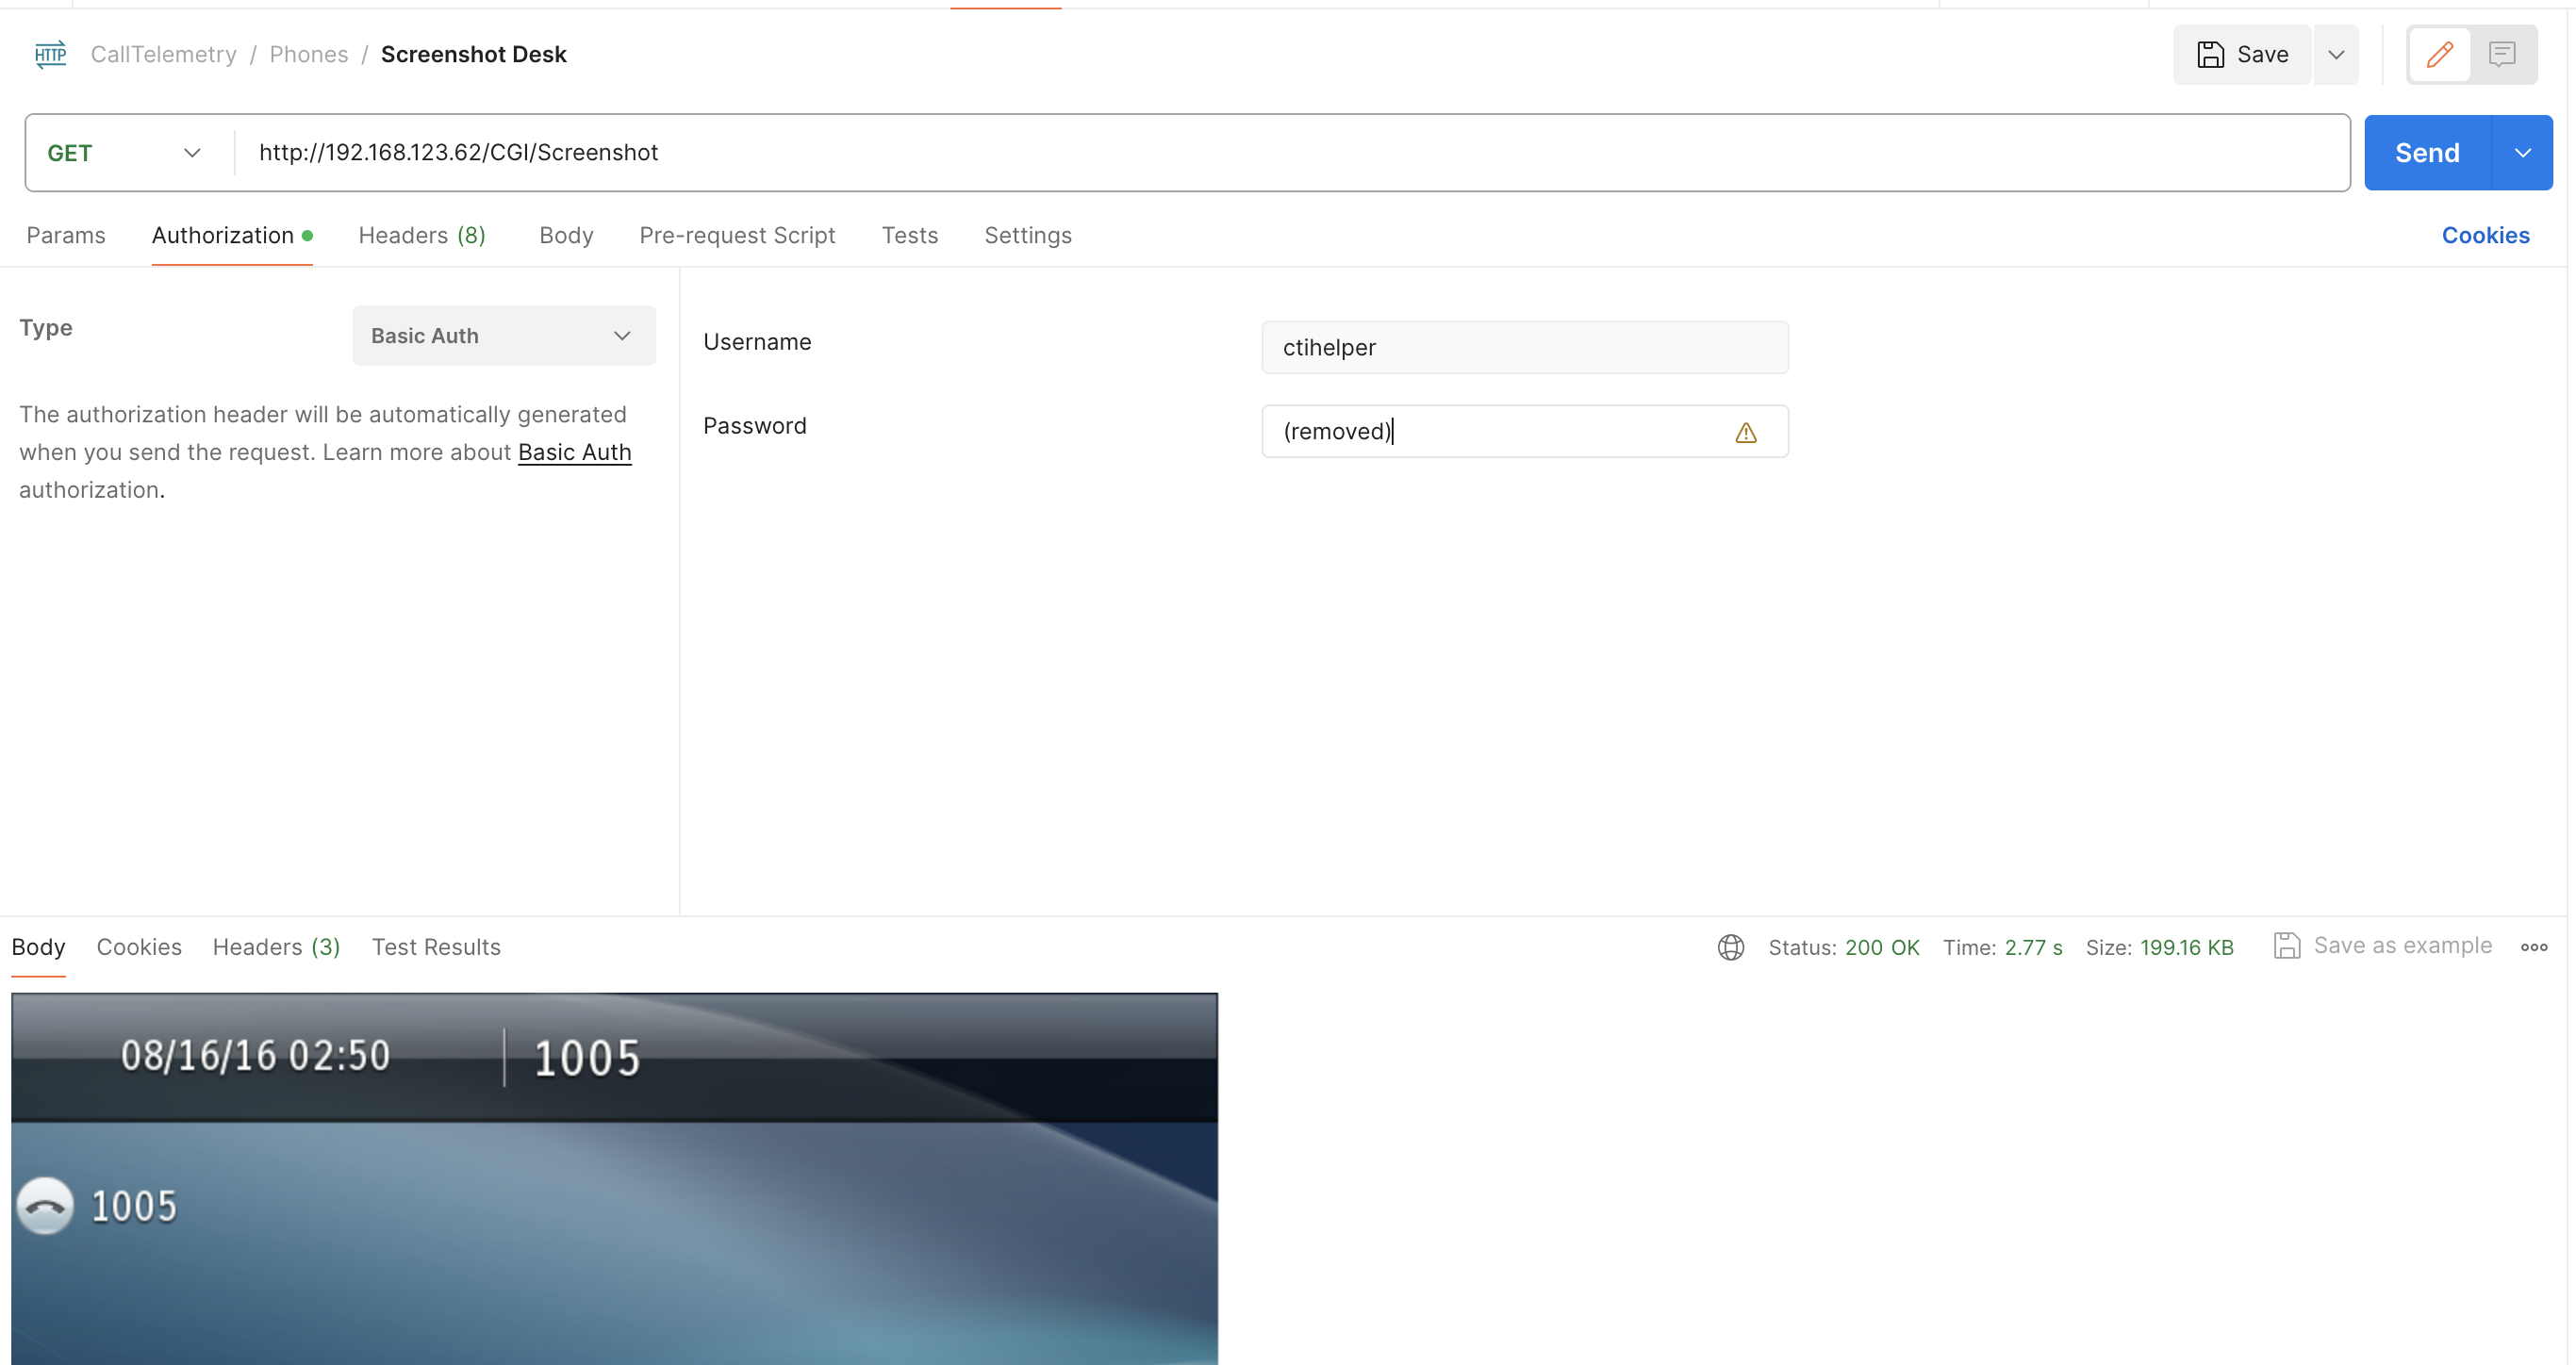
Conclusion
If you've made it this far, you've done a lot of troubleshooting. You've verified the configuration of the Cisco Callmanager, the Cisco IP Phone, and have directly interacted with both to validate the configuration.
If you're still having issues, reach out to Support for further assistance.