Creating a Call Policy Integration with Cisco Callmanager
Overview
This guide outlines the process of integrating Cisco Callmanager via the CURRI API to enable real-time call event triggering and policy enforcement within Call Telemetry.
Requirements
- Call Telemetry Appliance 0.7.0 or higher
- Cisco Callmanager 8.5 or higher
- Administrator access to Cisco Callmanager
- Basic understanding of Cisco Callmanager configurations
Step 1 - Create a Call Policy in Call Telemetry
Navigate to the Realtime Policies sidebar within Call Telemetry and create a new policy. Assign a name and choose if you would like this policy to actively blocking numbers from the Global Call Block List.
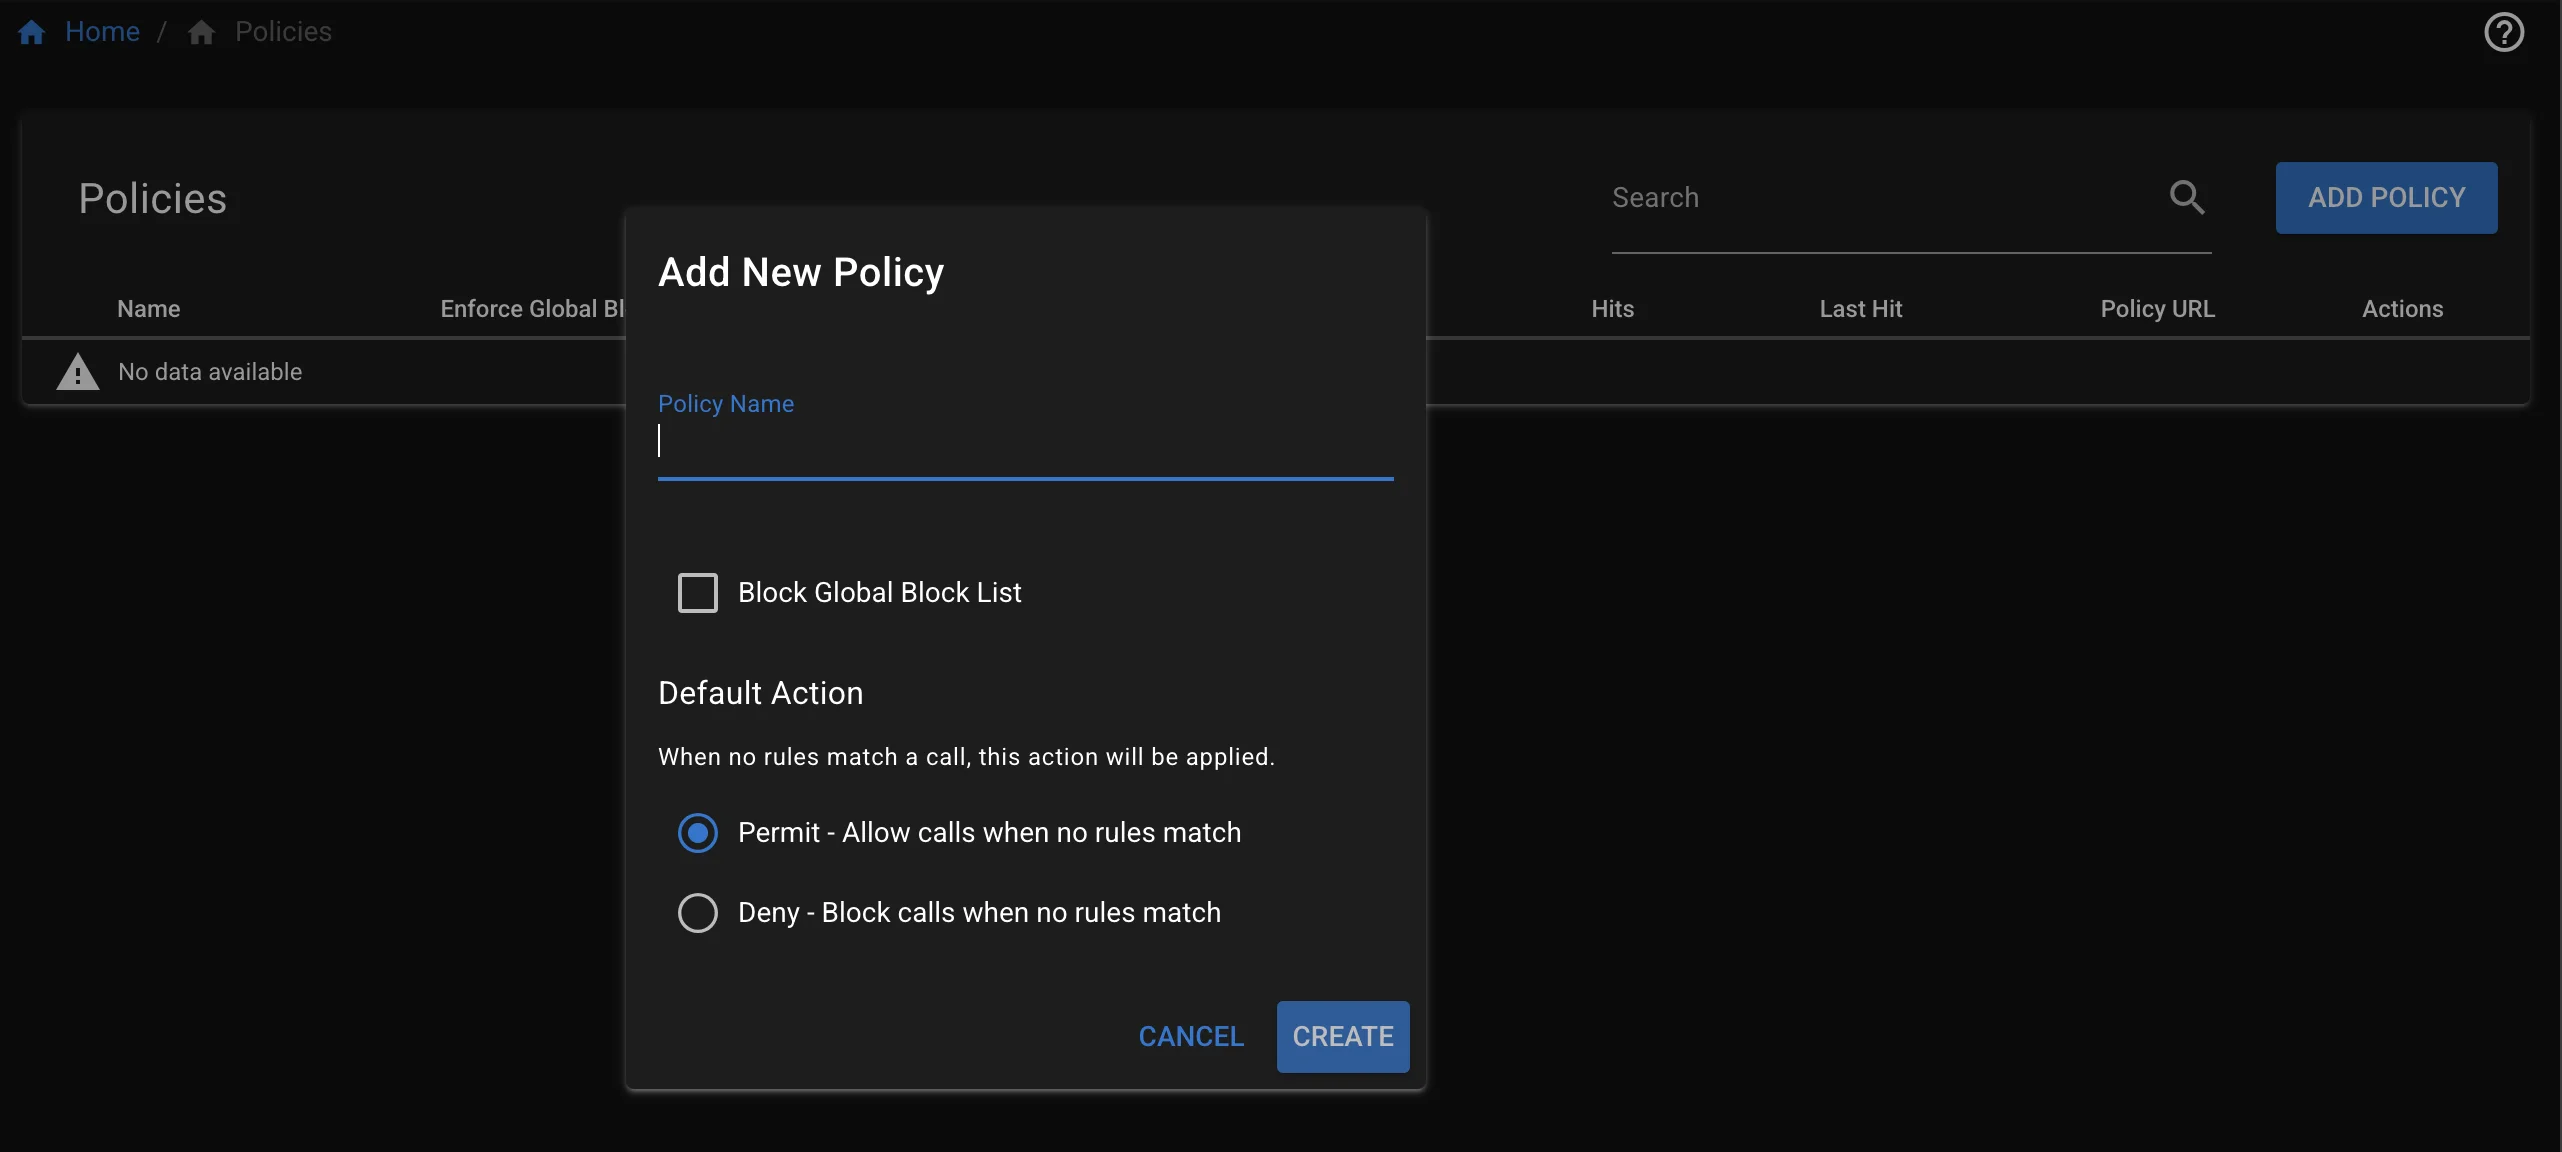
Your policy will start in an Offline state, and you need to link to Callmanager to get it registered and ready to use.
Connecting your ECC CURRI Policy to Callmanager
There are two ways to integrate with Cisco Callmanager, either Manual and Auto Provision.
- Manual Provision
- Auto Provision
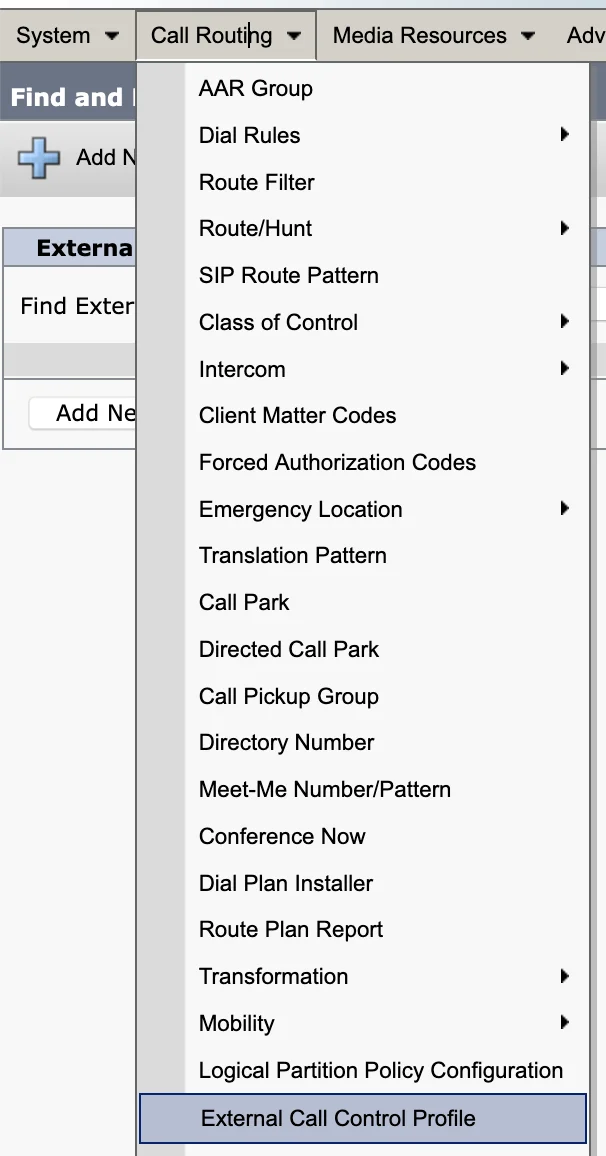
Manual Provision - Copy and Paste the URL to Callmanager
- Copy the policy URL from the Policies Page in Call Telemetry.

- Paste the URL as an External Call Control Profile in Callmanager under the Routing Menu.
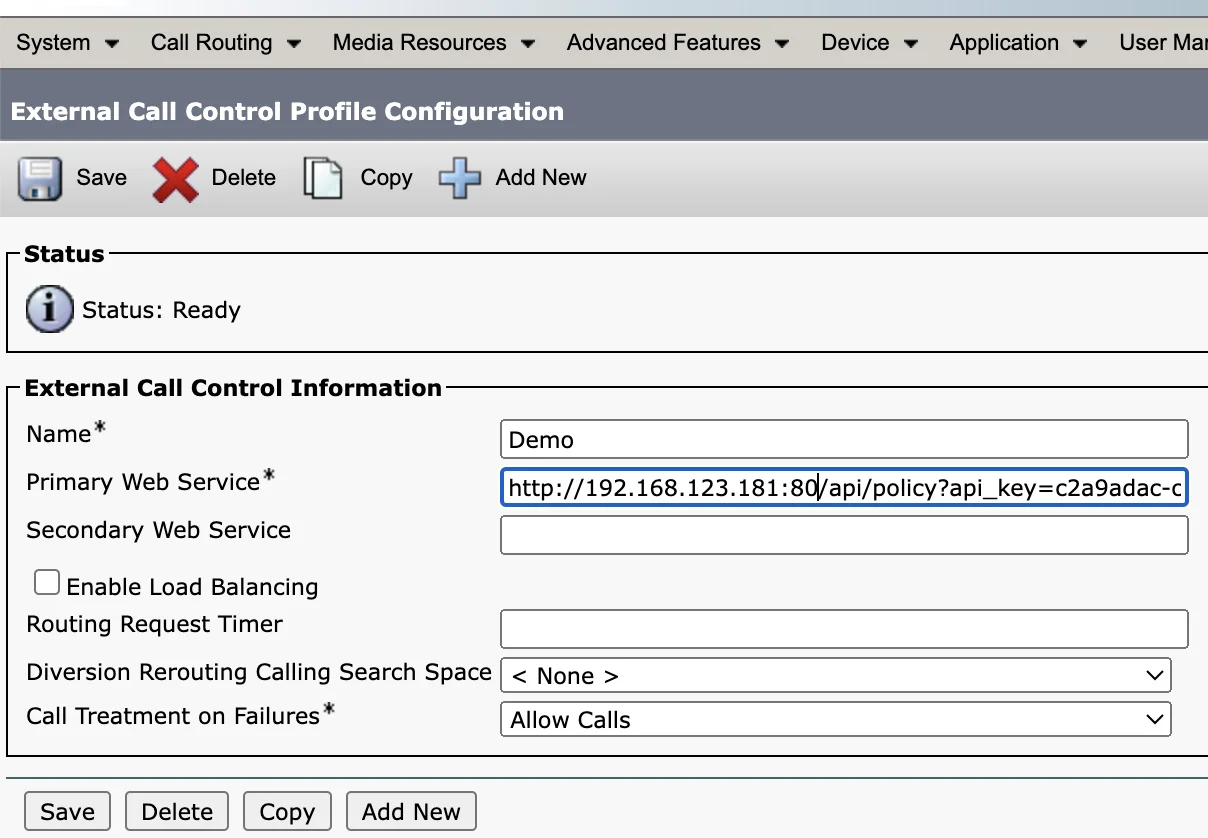
Make sure to include port 80 in your URL, unless you would like to Configure TLS CURRI API Integration.
Auto provision a Call Policy with Cisco Callmanager
You can also automatically push policies to Callmanager from Call Telemetry.
Auto Provision Requirements
- Call Telemetry Appliance 0.7.7 or higher
- Cisco Callmanager 8.5 or higher integration tasks.
- You Cisco Integration AXL user for the above integration must have AXL API and write permissions
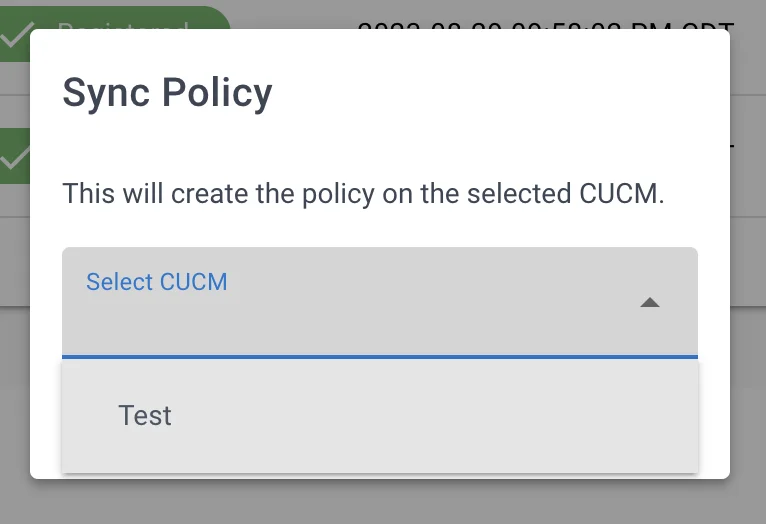
Auto provision available on the right of the policy button with the 2 arrows.

Select the appropriate Cisco Callmanager cluster to push the CURRI policy to, then initiate the auto-provisioning process.
Verify Call Policy Creation in Cisco Callmanager
Login to your Cisco Callmanager and navigate to the External Call Control Profile page to verify the policy was created. It's imortant to double check the hostname and port number are correct for your environment and appliance.
Make sure to check the URL and port are correct for your Call Telemetry server.
Step 3 - Verify Call Policy Status in Call Telemetry
After you have created your Policy as an Extended Call Control Profile within Callmanager, it will reach out and try to register via CURRI API to Call Telemetry.
If this is successful, Call Telemetry will refresh and show the policy as registered, as seen below.

If your policy is not Registered, no rules will match, you won't see hits, and the policy will not be enforced.
Apply a Call Policy to a Cisco IP Phone, Translation or Route pattern
You can read more about how to design your flow here - Designing for CURRI API Policies.
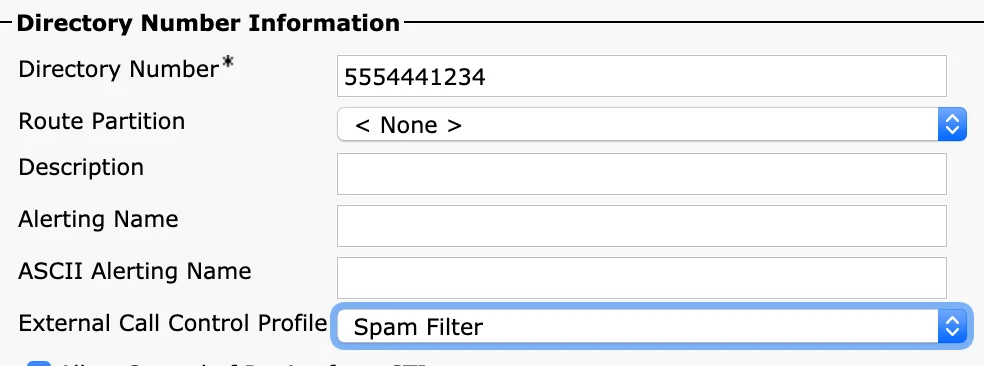
Example for a Cisco IP Phone
Below is an example of how to apply a policy to a Cisco IP Phone.
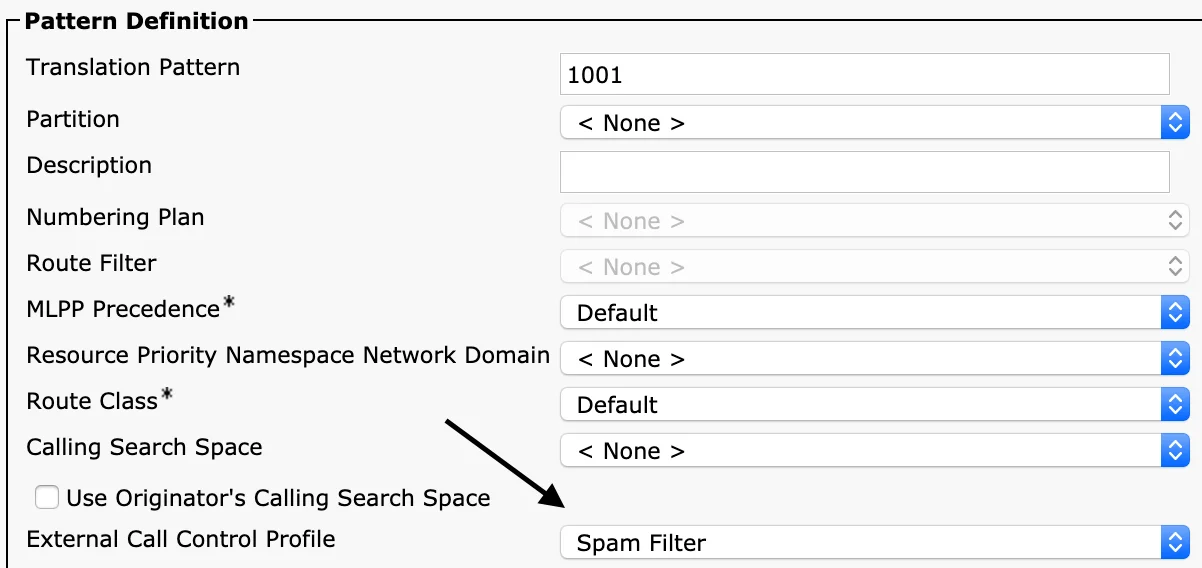
Example for a Route or Translation Pattern
Below is an example of how to apply a policy to a Translation Pattern.
Next Steps - Setup Rule Triggers
Next up, let's learn about rules and their triggers, and how they relate to policies.
Click into the Policy you created to see the default Policy created - .* to .*, with Global Block List Enforcement enabled.
Learn more about Rule Triggers.