Appearance
SOAP Query App for CMDB Location Services
Overview
The SOAP Query app connects your Call Telemetry system to your enterprise Configuration Management Database (CMDB) to provide real-time location data during emergency calls. When a 911 call is placed, this app queries your CMDB via SOAP/XML APIs to retrieve detailed location information including building, floor, room, and asset details.
This call policy app works with any SOAP-based CMDB that maintains network device and location data. This aligns with many large enterprises with existing IT asset management systems.
How does this help with E911?
- Leverage Existing CMDB Data - Use your current asset database for emergency location
- Real-time Location Lookups - Query live CMDB data during 911 calls
- Hierarchitcal Accuracy Levels - Details down to the Port-level when integrated with network discovery
- Multiple CMDB Support - Works with HP Service Manager, ServiceNow, BMC Remedy, and more
Compatible CMDB Systems
This app integrates with enterprise CMDB platforms that provide SOAP APIs:
- HP Service Manager - Via wrapper services or direct integration
- ServiceNow CMDB - When SOAP endpoints are enabled
- BMC Remedy CMDB - Through SOAP web services
- Cherwell ITSM - Via SOAP API endpoints
- Micro Focus Universal CMDB - Using UCMDB Web Service API
- Custom CMDB Services - Any SOAP service with location data
Prerequisites
Before configuring the SOAP Query app:
- Call Telemetry Appliance - Version 0.7.0 or later. Deployment Guide
- Call Telemetry Premium or Demo License
- Cisco CallManager 8.5 - Configured with CURRI API Integration. Setup Guide
- Phone Discovery App - Required for network device data
- CMDB SOAP Access - Service account with read permissions
- Network Connectivity - HTTPS access from Call Telemetry to CMDB
How It Works
The SOAP Query app integrates with your emergency call workflow:
- Phone Discovery - Identifies the calling phone's network details (subnet, switch, port)
- CMDB Query - Sends XML SOAP request with device information to your CMDB
- Location Extraction - Parses XML response to extract building, floor, room data
- Template Rendering - Formats location data for emergency alerts
- Alert Integration - Provides structured data for emergency notifications
Configuration Steps
Step 1: Create the SOAP Query App
Navigate to Policies → Apps → Post Call Apps → Select SOAP Query → Click Create App:
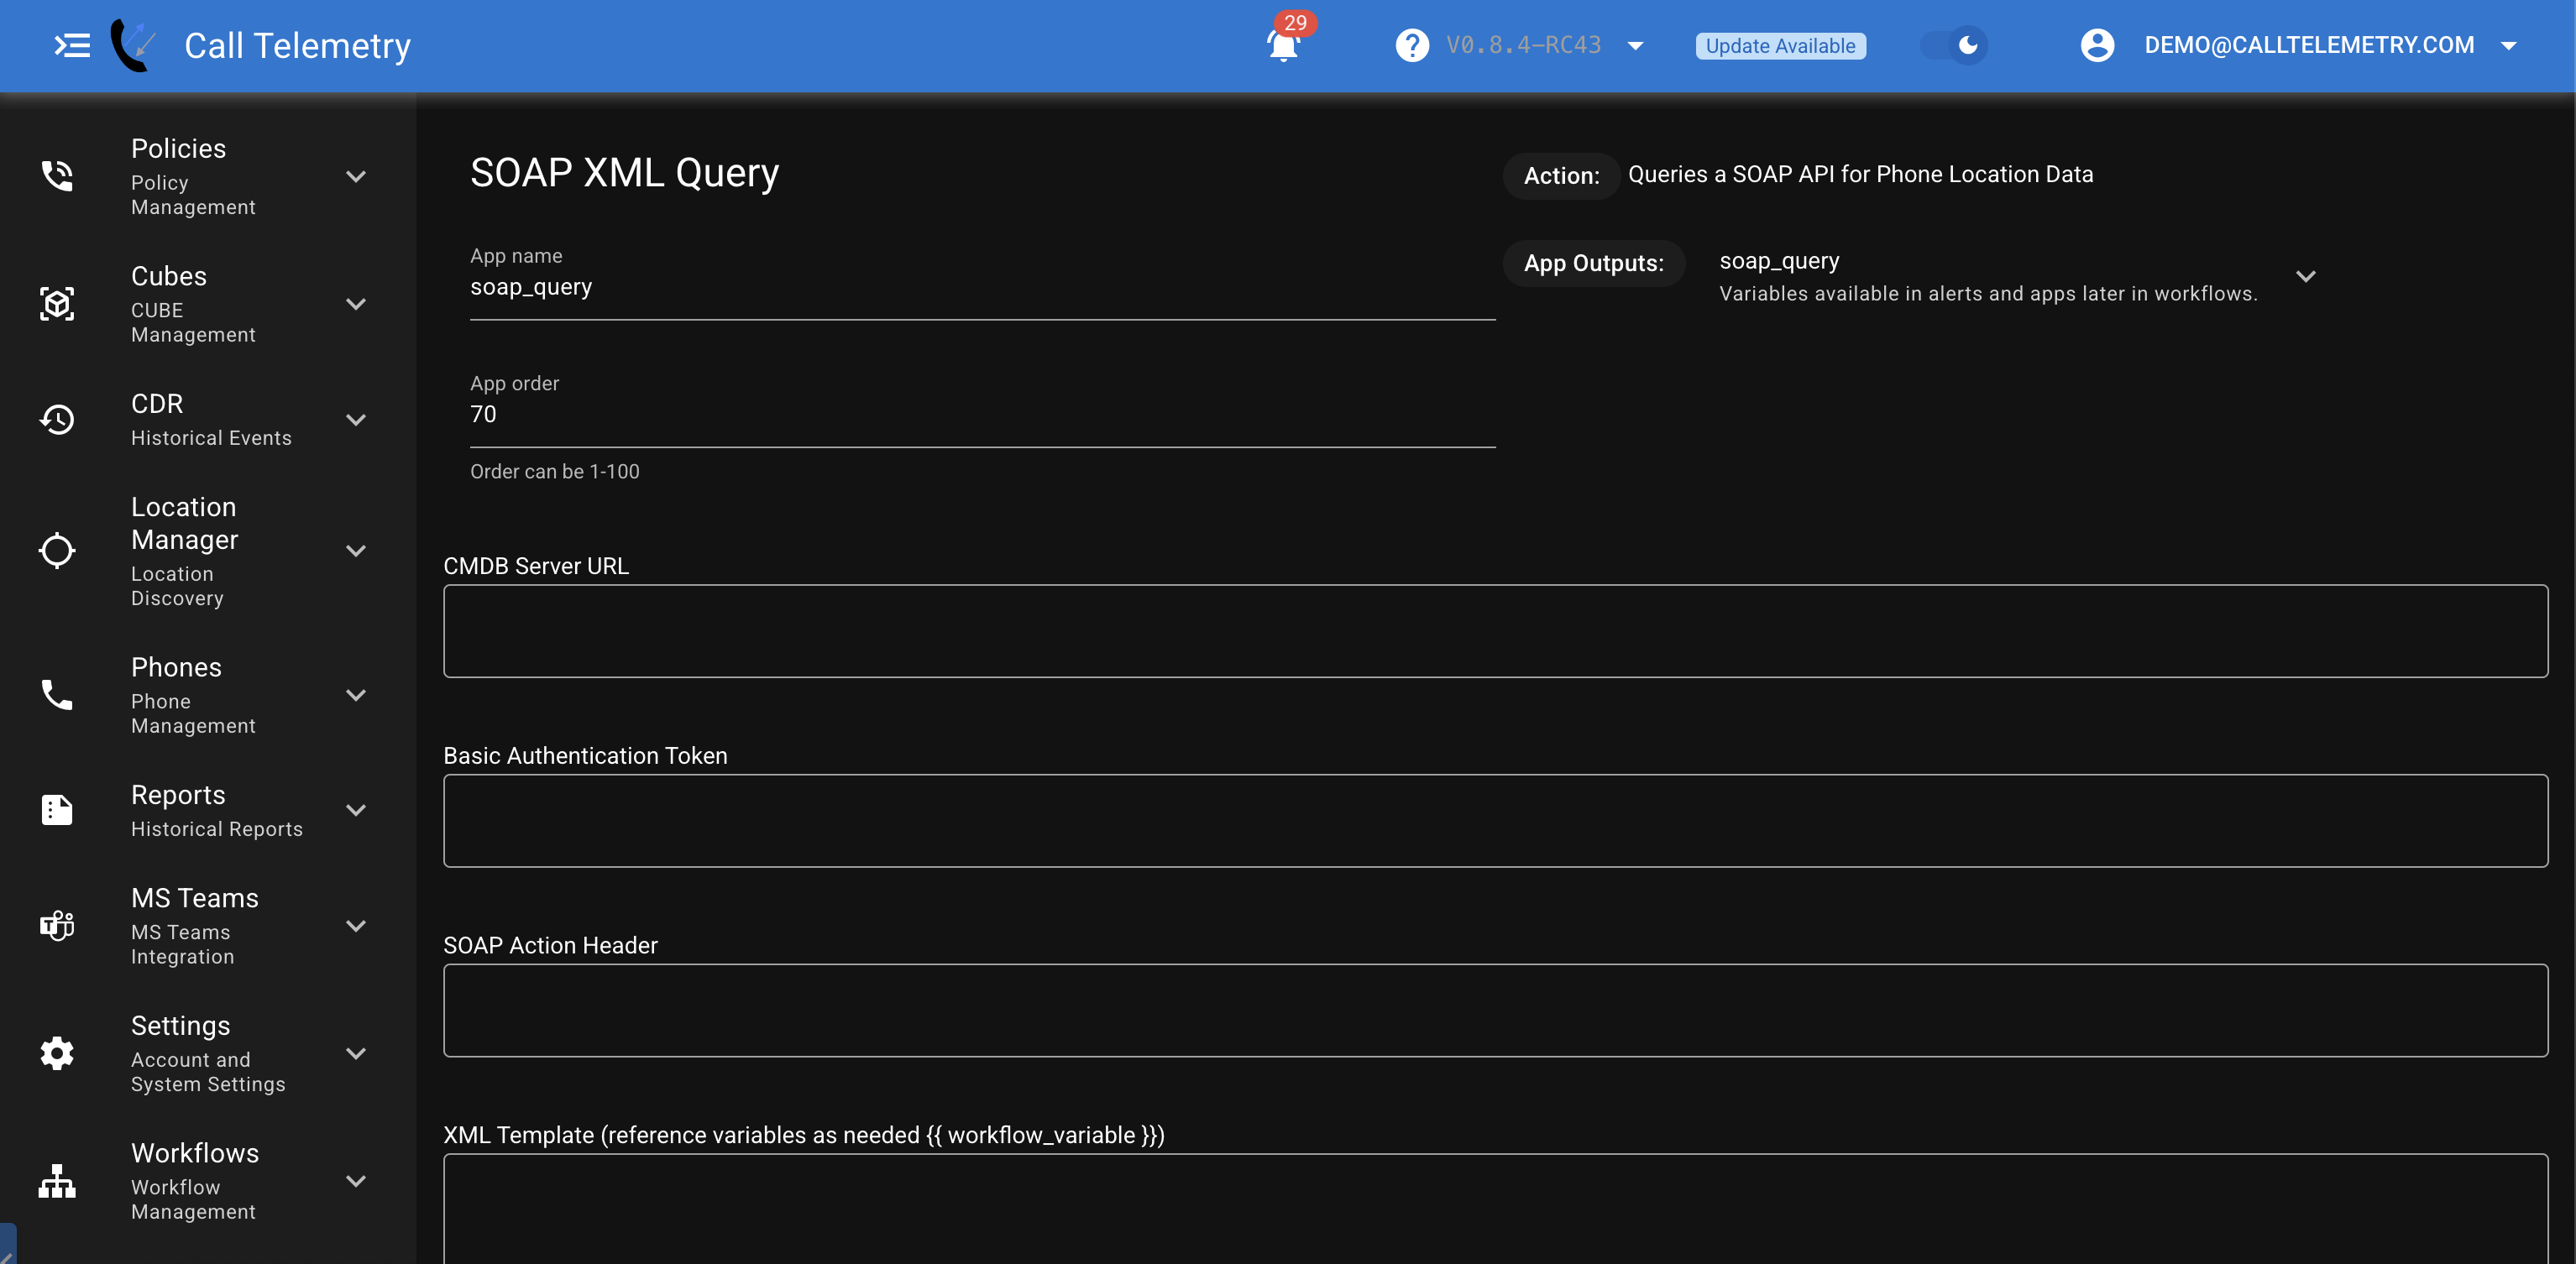
Step 2: Configure Required Fields
Fill in your CMDB connection details:
- App Name - "CMDB E911 Location Lookup" (or any descriptive name)
- App Order - Execution order (e.g., 70) - controls when this app runs relative to other apps
- CMDB Server URL - Your CMDB SOAP endpoint (e.g.,
https://cmdb.company.com/CMDBService/DetailsService) - Basic Authentication Token - Base64-encoded credentials (e.g.,
c2VydmljZWFjY291bnQ6cGFzc3dvcmQ=)- Encode
username:passwordto Base64 - Leave blank if your CMDB doesn't require authentication
- Encode
- SOAP Action Header - The SOAP action for your CMDB (e.g.,
http://CMDBws.company.com/DetailsService/GetCIDetails) - XML Template - Your SOAP envelope template with variables (see Step 3 below)
Step 3: Build Your SOAP Request
Create an XML template that queries your CMDB. This example queries by network device name:
xml
<soapenv:Envelope xmlns:soapenv="http://schemas.xmlsoap.org/soap/envelope/"
                  xmlns:det="http://CMDBws.company.com/DetailsService">
  <soapenv:Body>
    <det:GetCIDetails>
      <det:FIELDS>LOCATION,BUILDING,FLOOR,ROOM,LOGICAL_NAME</det:FIELDS>
      <det:FILTER>NETWORK_NAME='{{ app_data.phone-discovery.data.neighbor.neighbor_name }}'</det:FILTER>
    </det:GetCIDetails>
  </soapenv:Body>
</soapenv:Envelope>
Available Template Variables
Use these variables in your SOAP request:
{{ app_data.phone-discovery.data.neighbor.neighbor_name }}- Switch hostname{{ app_data.phone-discovery.data.neighbor.neighbor_port }}- Switch port{{ app_data.phone-discovery.data.phone.ip }}- Phone IP address{{ event.calling_number }}- Calling phone number{{ event.called_number }}- Called phone number{{ event.calling_devicename }}- Calling device name (e.g., SEP000832C78E0F)
Step 4: Configure Message Templates
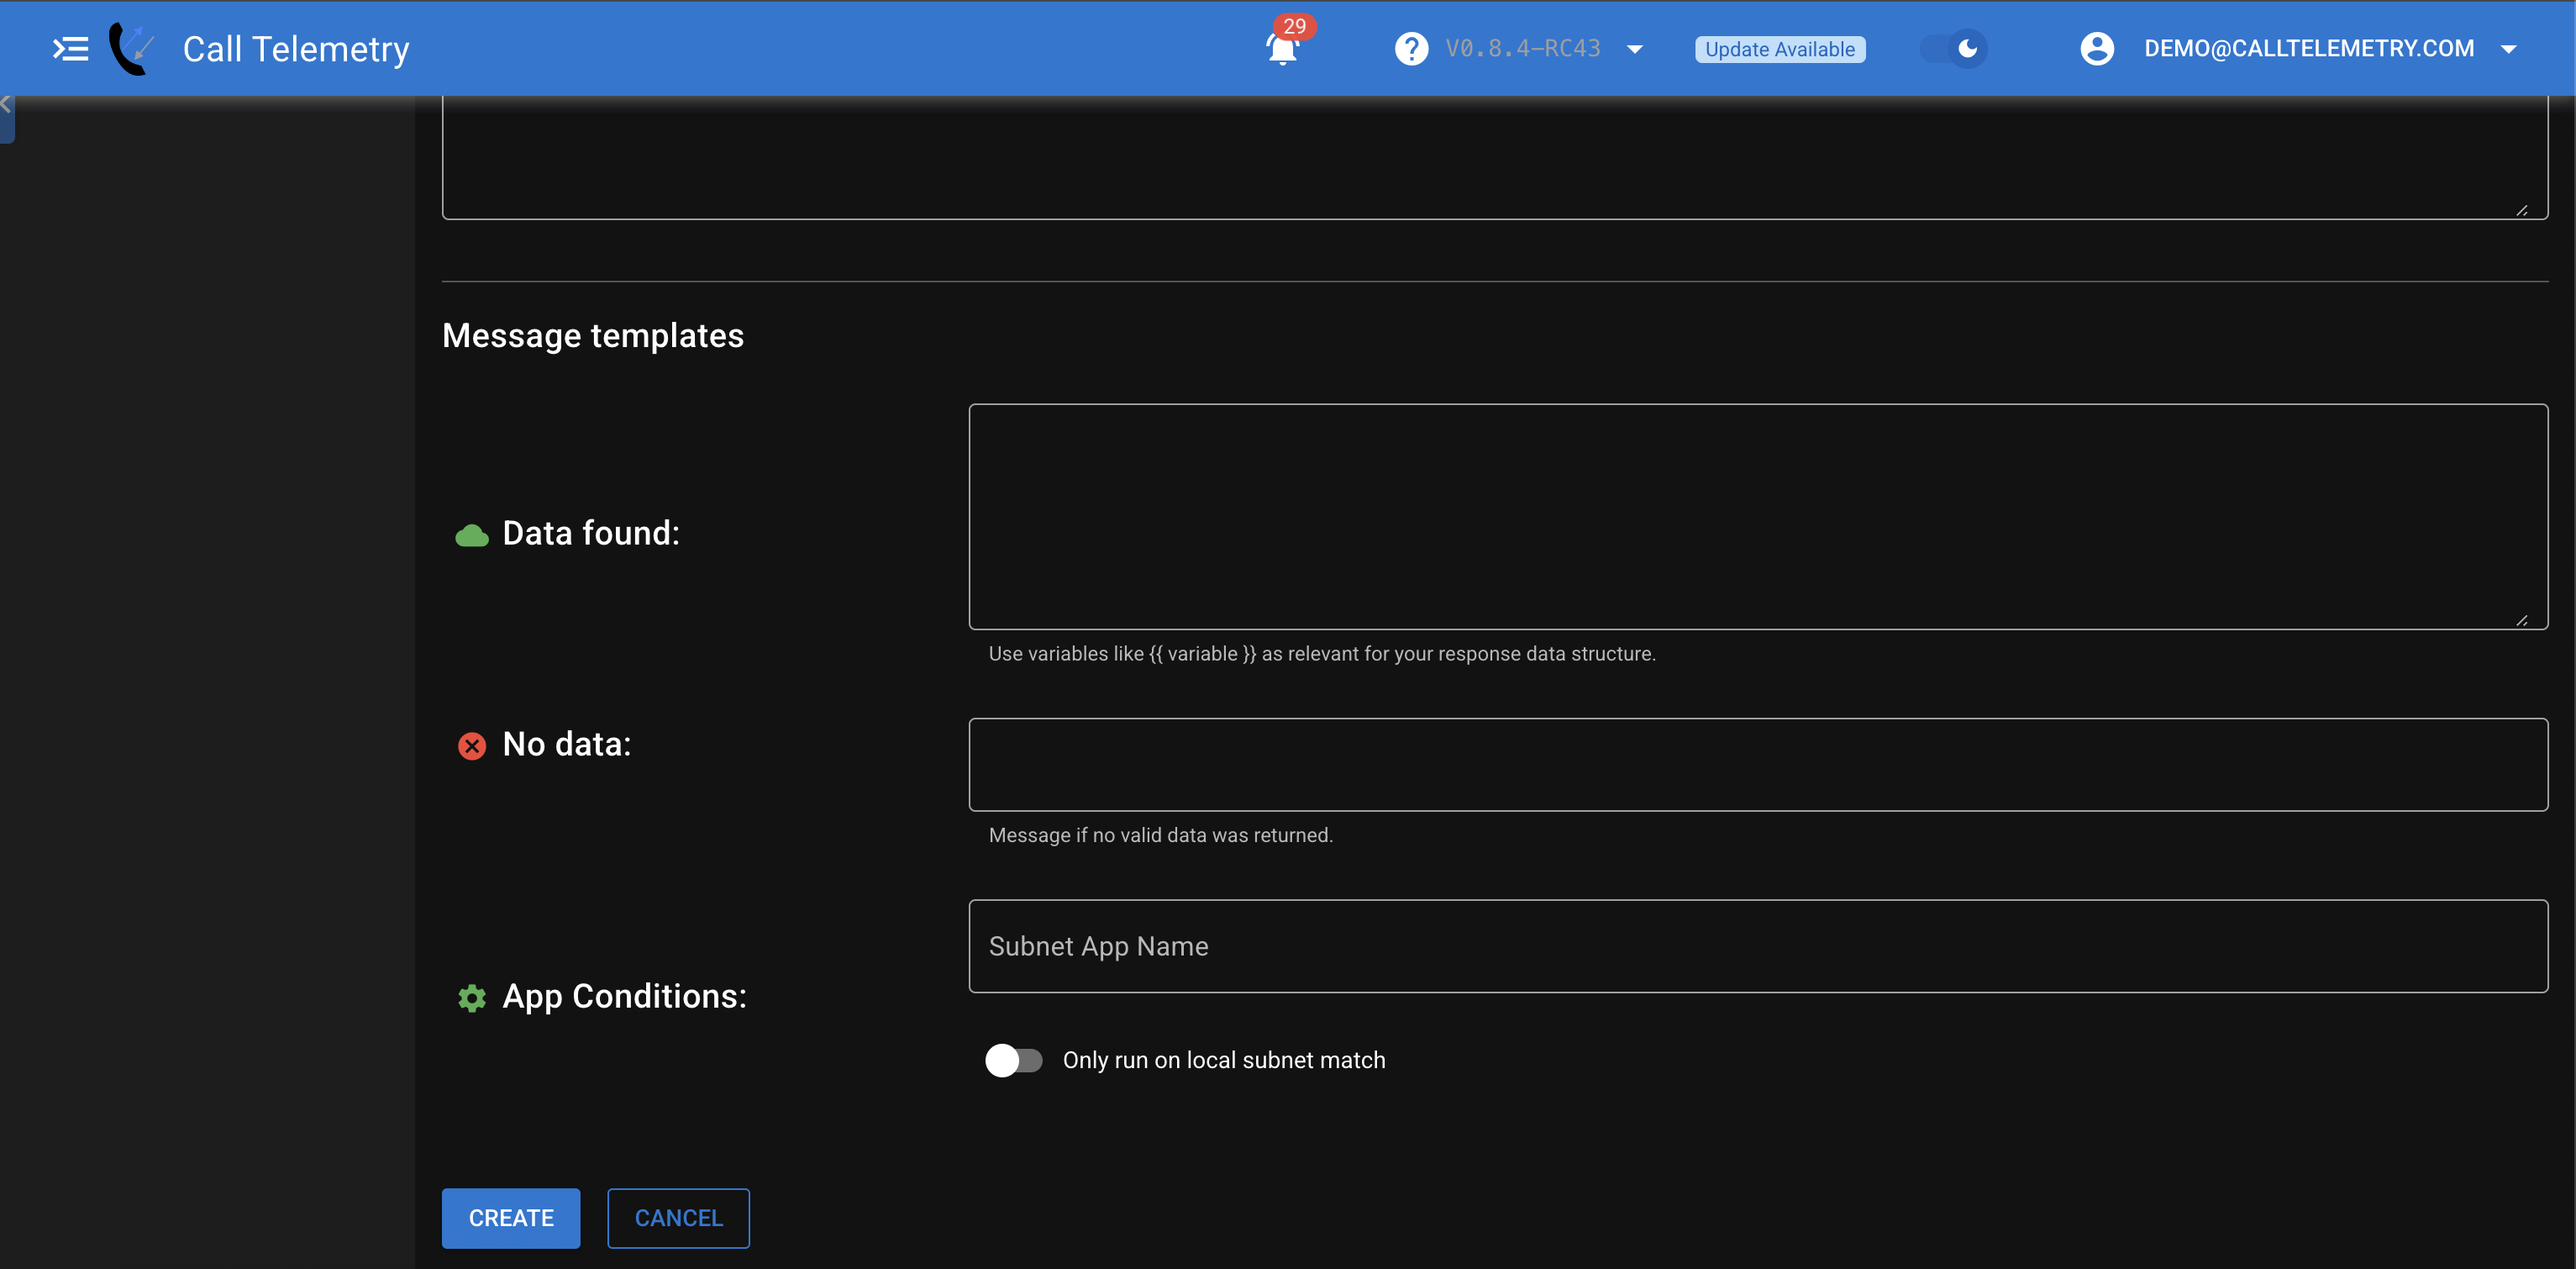
Message templates control what information is passed to your emergency alerts and other apps in the workflow. The SOAP Query app retrieves raw XML data from your CMDB, but you need to format this data into human-readable messages that emergency responders can understand.
Configure how to handle successful and failed CMDB lookups:
Data found Template
Format the location message when CMDB returns data:
- This becomes the
messagefield that downstream apps (SMS, Email, Teams) will use - Use variables like
{{ variable }}to access CMDB response fields - Default: "Example Data message."
- Example: See Step 5 for emergency location formatting
- The formatted message is what security teams and first responders will see in their alerts
No data Template
Message when CMDB returns no location data:
- Critical for emergency situations where location can't be determined
- This message alerts responders that automatic location failed
- Default: "No data returned from the API."
- Recommended: "LOCATION UNKNOWN - Dispatch to main address"
- Consider including fallback instructions or main campus address
App Conditions (Optional)
Subnet App Name: Select a Subnet CSV app to enable subnet-based filtering
- Leave blank to query CMDB for all calls
- When selected, enables the "Only run on local subnet match" option
Only run on local subnet match: When checked, CMDB queries only run for devices on "local" subnets
- Requires a configured Subnet CSV app
- Prevents unnecessary queries for remote/VPN users
- The subnet app must classify subnets with a
typefield set to "local" or "remote"
Trace Service
Optional service name for debugging and log filtering (e.g., "CMDB_E911")
Step 5: Configure Output Template
Define how to format the CMDB response for emergency alerts:
text
EMERGENCY LOCATION: {{ getcidetailsresponse.getcidetailsresult.cidetails.configurationitem.building }}
Floor {{ getcidetailsresponse.getcidetailsresult.cidetails.configurationitem.floor }}
Room {{ getcidetailsresponse.getcidetailsresult.cidetails.configurationitem.room }}
Template Path Notes
- XML elements are converted to lowercase with underscores
- Access nested data using the full path
- Example:
BUILDINGfield →{{ ...configurationitem.building }}
Understanding App Results
When Location is Found
The app returns structured location data when the CMDB query succeeds:
- Result: "success" - Query completed successfully
- Message: Your formatted location text (e.g., "Building HQ Floor 12 Room 1205")
- Data: Parsed CMDB response with all available fields
When No Data is Found
Several conditions can prevent location lookup:
- No Phone Discovery Data: Phone Discovery didn't find network information
- Subnet Filter Applied: Device is on a remote subnet (when local subnet filtering is enabled)
- CMDB Returns Empty: Network device not found in CMDB
- Configuration Issues: Missing subnet app or invalid XML template
Each condition provides a specific error message to help troubleshoot.
Common Configuration Examples
Basic Building Location
The simplest configuration queries by network switch name to get building and floor:
- What to Query: Switch hostname from Phone Discovery
- Fields to Request: BUILDING, FLOOR, ROOM, LOCATION
- Output Template:
"Emergency Location: Building {{ ...building }} Floor {{ ...floor }}"
Precise Port-Level Location
For exact room identification, query by both switch and port:
- What to Query: Switch name AND port number
- Why It's Better: Each port maps to a specific room/cube
- Output Template:
"{{ ...building }}-{{ ...floor }}-{{ ...room }} ({{ ...location }})"
Campus with Multiple Buildings
Large campuses need additional location context:
- Use Case: Helps responders navigate large facilities
- Output Template:
"{{ ...campus }} Campus, {{ ...building }} Building, Floor {{ ...floor }}, {{ ...wing }} Wing"
How CMDB Data Appears in Call Telemetry
Successful Location Lookup
When the CMDB finds location data, you'll see:
In Call Events:
- App Status: ✓ Success
- Location Message: "Building HEADQUARTERS Floor 12 Room 1205-A"
- All CMDB fields available for alerts and webhooks
In Emergency Alerts:
- Your formatted location text appears in emails/SMS
- Additional CMDB data can be included if needed
When Subnet Filtering Blocks a Query
If you've enabled "Only Local Subnet" and the device is remote:
What Happens:
- CMDB query is skipped entirely
- Message shows: "No local subnet available to query"
- Saves time by not querying for VPN/remote users
Best Practice: Use this with a Subnet CSV app that properly classifies your network ranges as local vs. remote.
Testing Your Integration
Step 1: Verify Phone Discovery
Ensure Phone Discovery is providing network data:
- Run a Call Test
- Check
app_data.phone-discovery.data.neighbor - Confirm switch name and port are populated
Step 2: Test CMDB Query
Create a test call to verify CMDB response:
- Navigate to Policies → Call Test
- Use a phone number in your building
- Check Results →
app_data.soap_query.data - Verify location fields are populated
Look for the SOAP Query results in the test output - you should see your parsed CMDB data and the formatted message.
Step 3: Validate Emergency Message
Confirm the formatted emergency message:
- Review the
messagefield in test results - Verify all location components are included
- Test with phones from different buildings
- Check error message for unknown devices
Troubleshooting
Common Issues and Solutions
"No hostname available from phone discovery"
- Ensure Phone Discovery app runs before SOAP Query
- Verify CDP is enabled on phones and switches
- Check Phone Discovery is finding neighbor data
"XML parser error"
- Validate your XML request template syntax
- Check for unescaped special characters
- Verify SOAP envelope structure
- Test the SOAP query directly with a tool like SoapUI
"HTTP error" or Authentication Failed
- Verify CMDB endpoint URL is correct
- Check firewall allows HTTPS to CMDB
- Confirm Base64 auth token is properly encoded
- Test credentials directly against CMDB
Empty or Missing Location Data
- Verify CMDB field names match exactly (case-sensitive)
- Check that network devices exist in CMDB
- Ensure service account has read permissions
- Validate FILTER criteria matches CMDB data
Template Variables Not Replaced
- Check variable names match exactly
- Ensure Phone Discovery provides required data
- Verify template syntax uses double braces with spaces
How to Test Your Configuration
Use Call Test Feature:
- Go to Policies → Call Test
- Calling Number: Enter a phone extension from your building (this is the 911 caller)
- Called Number: Enter your test 911 pattern (e.g., 911, 9911, or your test number)
- Policy: Select the policy that has your SOAP Query app attached
- Click Run Test
Check Your Results:
- Expand the test results to see all app outputs
- Look for
app_data.soap_querysection - Check the
messagefield - this is what your alerts will show - Review
datasection to see raw CMDB response - Any errors will show with specific error messages
Best Practices
App Stacking Order
The most critical best practice is getting your app order right. Apps execute in order based on their "App Order" number (lower numbers run first). For E911 location services, always stack your apps in this sequence:
- Phone Discovery (Order: 10-20) - Gathers phone details, CDP/LLDP neighbor info, and IP addresses
- SOAP Query (Order: 50-70) - Uses Phone Discovery data to query your CMDB
- Alert Apps (Order: 90-100) - SMS, Email, Teams notifications using the enriched location data
This order ensures each app has the data it needs from previous apps. Phone Discovery must run first to get the switch hostname that SOAP Query needs for its CMDB lookup.
Integration with Other Apps
The SOAP Query app works seamlessly with:
- Phone Discovery App: Provides network device data for CMDB queries
- Subnet CSV App: Fallback location data when CMDB lacks information
- Call Alerts: Send emergency notifications with CMDB location
- Webhook Apps: Forward enriched location to external systems
Recommended App Stack
For comprehensive E911 location services:
- Phone Discovery - Get network topology
- SOAP Query - Primary location from CMDB
- Subnet CSV - Backup location data
- Email/SMS Alert - Notify security team
This layered approach ensures location data is always available, even if one source fails.
Advanced Configuration
Using Subnet Filtering Effectively
When to Enable "Only Local Subnet":
- Your organization has many remote/VPN users
- CMDB only contains on-premise location data
- You want to reduce unnecessary CMDB queries
Required Setup:
- Create a Subnet CSV app with your network ranges
- Mark campus subnets as "local"
- Mark VPN/remote ranges as "remote"
- Select this app in the SOAP Query subnet filter
What Happens:
- Local subnet calls → CMDB query runs normally
- Remote subnet calls → Query skipped, uses fallback message
- No subnet data → Query runs anyway (fail-safe)
Handling Missing Data Scenarios
Scenario 1: CMDB Has No Record
- The network device isn't in your CMDB
- Use the "No Data Message" as fallback
- Consider adding a backup Subnet CSV app
Scenario 2: Phone Discovery Failed
- No network information to query with
- Check CDP is enabled on switches
- Verify Phone Discovery app is configured
- Ensure web access is enabled on phones in CallManager
Scenario 3: Wrong Subnet App Name
- Error: "Referenced subnet app doesn't exist"
- Solution: Type the exact name of your Subnet CSV app
- The name is case-sensitive and must match exactly
- Or leave the field blank if not using subnet filtering
Summary
The SOAP Query app transforms your existing CMDB investment into a real-time emergency location service. By integrating with Phone Discovery and your CMDB's SOAP API, you can provide accurate, detailed location information for every 911 call - helping emergency responders reach people faster while leveraging the IT asset data you already maintain.